If you want a lush, healthy lawn next spring, fall is the time to act, and lawn aeration should be high on your to-do list. Especially here in central Virginia, where dense clay soil and hot, humid summers lead to serious compaction, fall aeration gives your grass the breathing room it needs to thrive.
But there’s a catch: aeration works best when your yard is properly prepared. From mowing and watering to marking obstacles and choosing the right time, a few strategic steps can make a major difference in the results you see.
Here’s how to prep your lawn so that your fall aeration efforts pay off.
Why Fall Aeration Matters
Before we get into the prep work, let’s talk about why aeration is so essential – especially in the fall.
Over time, Virginia’s clay-heavy soils become compacted from things like mowing, foot traffic, kids playing, or even just heavy rainfall. Compacted soil makes it hard for air, water, and nutrients to reach your grass’s root zone, resulting in patchy, stressed, or thinning lawns.
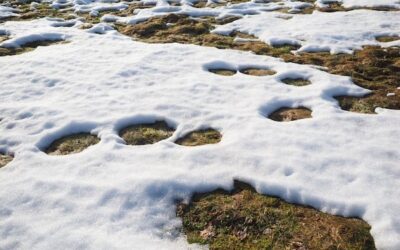
Fall is the ideal time to aerate because:
- Cool-season grasses (like tall fescue and Kentucky bluegrass) are actively growing.
- Soil temperatures are still warm enough to promote seed germination.
- There’s typically more rainfall, which helps with post-aeration recovery.
- Weeds are less aggressive than in spring.
By aerating in the fall, you give your lawn a strong foundation to recover from summer stress and prepare for winter dormancy.
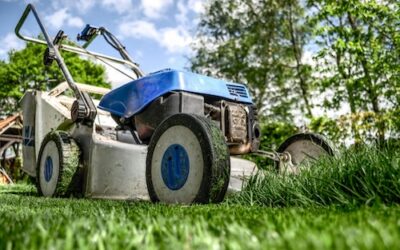
Step 1: Mow Your Lawn Shorter Than Usual
A day or two before your scheduled aeration, mow your lawn about 1”–1.5” shorter than you typically would. This exposes more soil to the aerator and ensures that the tines can penetrate deeply and effectively.
Be careful not to scalp the lawn – you don’t want to stress the grass, just give the machine a clearer path to the root zone.
Step 2: Water Thoroughly
Moist soil is much easier to aerate than dry, compacted ground. If there hasn’t been significant rainfall, water your lawn deeply (about 1 inch) the day before aeration. This softens the soil and helps the aerator pull up clean, even plugs.
Avoid watering on the actual day of aeration, as overly soggy soil can make a mess and reduce the effectiveness of the process.
Step 3: Mark All Obstacles
Aeration machines are powerful, and while they’re great at pulling plugs of soil, they’re not designed to avoid sprinkler heads, shallow utility lines, or invisible dog fences. Before the aerator arrives, take time to flag or mark:
- Sprinkler heads
- Landscape lighting
- Cable or fiber lines close to the surface
- Septic lines or tanks
- Irrigation control valves
- Tree roots near the surface
This will help avoid costly damage and ensure the job is done smoothly.
Step 4: Rake and Remove Debris
Clear your lawn of sticks, branches, pinecones, leaves, and anything else that could block the aerator’s tines. Excessive debris can reduce the number of holes the aerator creates and prevent the machine from reaching the soil evenly.
If your lawn has a heavy thatch layer (more than ½”), consider dethatching before aerating. Thatch can act as a barrier, stopping nutrients and moisture from penetrating. Dethatching in early fall gives your lawn time to recover before winter.
Step 5: Plan to Overseed and Fertilize
Fall aeration creates the perfect environment for overseeding and fertilizing. The holes left behind give new seeds direct contact with the soil, improving germination rates. Fertilizer can also reach the root zone more easily.
To take full advantage, have your seed and fertilizer ready to go immediately after aeration. For cool-season grasses in Charlottesville, now is the time to boost density and repair summer damage.
When choosing seed, look for high-quality blends suited for our region’s climate. A mix of tall fescue and Kentucky bluegrass works well for most Charlottesville lawns.
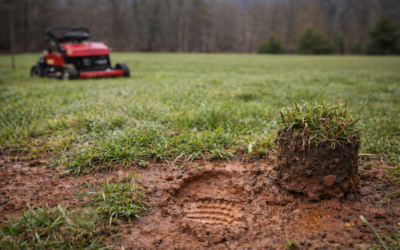
Step 6: Don’t Stress About the Plugs
After aeration, your lawn will be covered in little plugs of soil — and that’s a good thing! These plugs break down naturally over the next couple of weeks, returning nutrients to the lawn and improving the soil structure.
There’s no need to rake them up. In fact, leaving them helps your lawn recover more quickly.
Step 7: Keep the Lawn Moist
After aeration (especially if you’ve overseeded and fertilized), it’s important to keep the lawn consistently moist. Light, frequent watering for the first couple of weeks will help new seeds germinate and support root growth.
After that, you can transition back to a deeper, less frequent watering schedule.
Step 8: Stay Off the Grass
Try to limit foot traffic on your lawn for the first couple of weeks post-aeration — especially if you’ve overseeded. New seedlings are delicate, and you want to give them the best chance to establish without stress.
Bonus Tip: Consider Hiring a Pro
Aerating your lawn can be a big job, especially if your soil is compacted or your yard is large or sloped. Renting and operating a core aerator takes physical effort and care to avoid damage to your property.
Many homeowners in Charlottesville and around central Virginia choose to hire a professional lawn care company to handle fall aeration. A pro will know how to time it right, avoid buried lines, and combine aeration with seeding and fertilization for best results.
A Healthier Lawn Starts Now
Prepping your yard for fall aeration doesn’t have to be complicated, but a little planning goes a long way. By mowing, watering, clearing debris, and coordinating your seeding and fertilizing efforts, you set the stage for a greener, thicker lawn next spring.
If you’re in the Charlottesville area and want help getting your yard in top shape this fall, Jack’s Lawn Care & Landscaping is here to help. Our experienced team offers professional aeration, overseeding, and full-service lawn care tailored to Central Virginia’s unique soil and climate.
Whether you need a one-time service or ongoing lawn care in central Virginia, Jack’s can help you grow a lawn you’re proud of, season after season.